They say necessity is the mother of invention. This section covers a few necessary building aids, that have helped or will help in the construction of my RV12. If you are building, you might consider some of these items for your own use. Items covered include a cable tension meter, paint booth design, painting respirator design, and a fuselage pivot used for painting.
Cable Tension Meter
When I read the instructions about surface control cable tension requirements, I asked around to see if anyone had a cable tension meter I could borrow or knew where I might buy one. I didn't find anyone that had one to loan and the purchase price was out of the question. Even to rent one for a few days didn't seem reasonable. When I found this cable tension meter design by Larry McFarland, I knew I was home free. If I could make my own meter I would have it any time I needed it.
The meter is made from thin plate steel. The rollers are screen door rollers from Home Depot.
I cleaned and primed the metal because I wanted this tool around whenever I might need it.
I tried a number of different springs until I came up with the one that gave me the right tension and throw.
To calibrate the meter I simply applied different values of weight and noted the deflection of each.
The meter is easy to apply to the cable, will function the same in any orientation, and fits into a relatively small space. Some of the rentable meters are much larger and might be difficult to operate in the confined space of the tailcone.
As I applied more weight to the cable I noted the deflection on the meter. The deflection was very repeatable. I used one of the control cables from the kit for testing.
Paint Booth
As I assembled the plane, I kept running into prerequisites that needed to be accomplished before I could complete a task. For example, I didn't want to bolt the rear window onto bare metal. I wanted the metal painted first. I didn't want to rivet the canopy to the canopy frame until the frame was painted. I felt it would be easier to paint the landing gear struts before they were installed and the wheel assemblies installed on them. When I kept running into the need to paint items before they could be installed I knew I had to do something about painting.
I spent many weeks checking on possible ways to get parts painted. I thought I had an auto-body painter that would take on the challenge, but after many months that didn't pan out. Not wanting to pay the big bucks and haul the plane in pieces to an aircraft painter, I made the commitment to paint the plane myself.
Following the decision to paint came many more unknowns. What type of paint, where to get the paint, what type of spray equipment, what are the paint facility requirements, what is involved in metal preparation for painting, and what are the steps in the painting process. Each of these questions had to be answered. It has taken me around two months now to acquire the paint equipment and determine most of the other answers.
My current paint scheme looks something like this. It is always subject to change. My wheel pants are not shown.
The wing design is something like this. Again everything is subject to change.
What type of paint?
I thought at first I would use the Valspar Solar System Sunthane 2K polyurethane. Many of Van's planes had been painted using Valspar. But after a number of phone calls that were not returned and promises to have someone call back, that didn't happen, I gave up on Valspar.
Next I looked into the Sherwin Williams JetGlo paint. I contacted a local dealer and they referred me to their Green Bay office that handled aircraft paint. Contacting Green Bay I was told they didn't carry that paint, but they thought someone in Appleton carried it, but they didn't know who. So much for Sherwin Williams customer service.
My last and hopefully final investigation is with DuPont Imron paint. I contacted their closest supplier which is over 500 miles from me in Omaha, Nebraska. They sound like they are willing to ship their paint directly to me. They had their aircraft paint rep in Lincoln Nebraska call me. I finally got to talk to someone who knows his business. He could answer most of my questions and even made some painting scheme suggestions that makes sense. Those questions he couldn't answer off the top of his head he was going to investigate and call me back. So hopefully I've found my paint suppler.
I should note that all three of these paint systems are good. Professional aircraft painters usually select one of these systems and stick with it because that is what they know. But I'm sure they are all good.
What type of spray equipment?
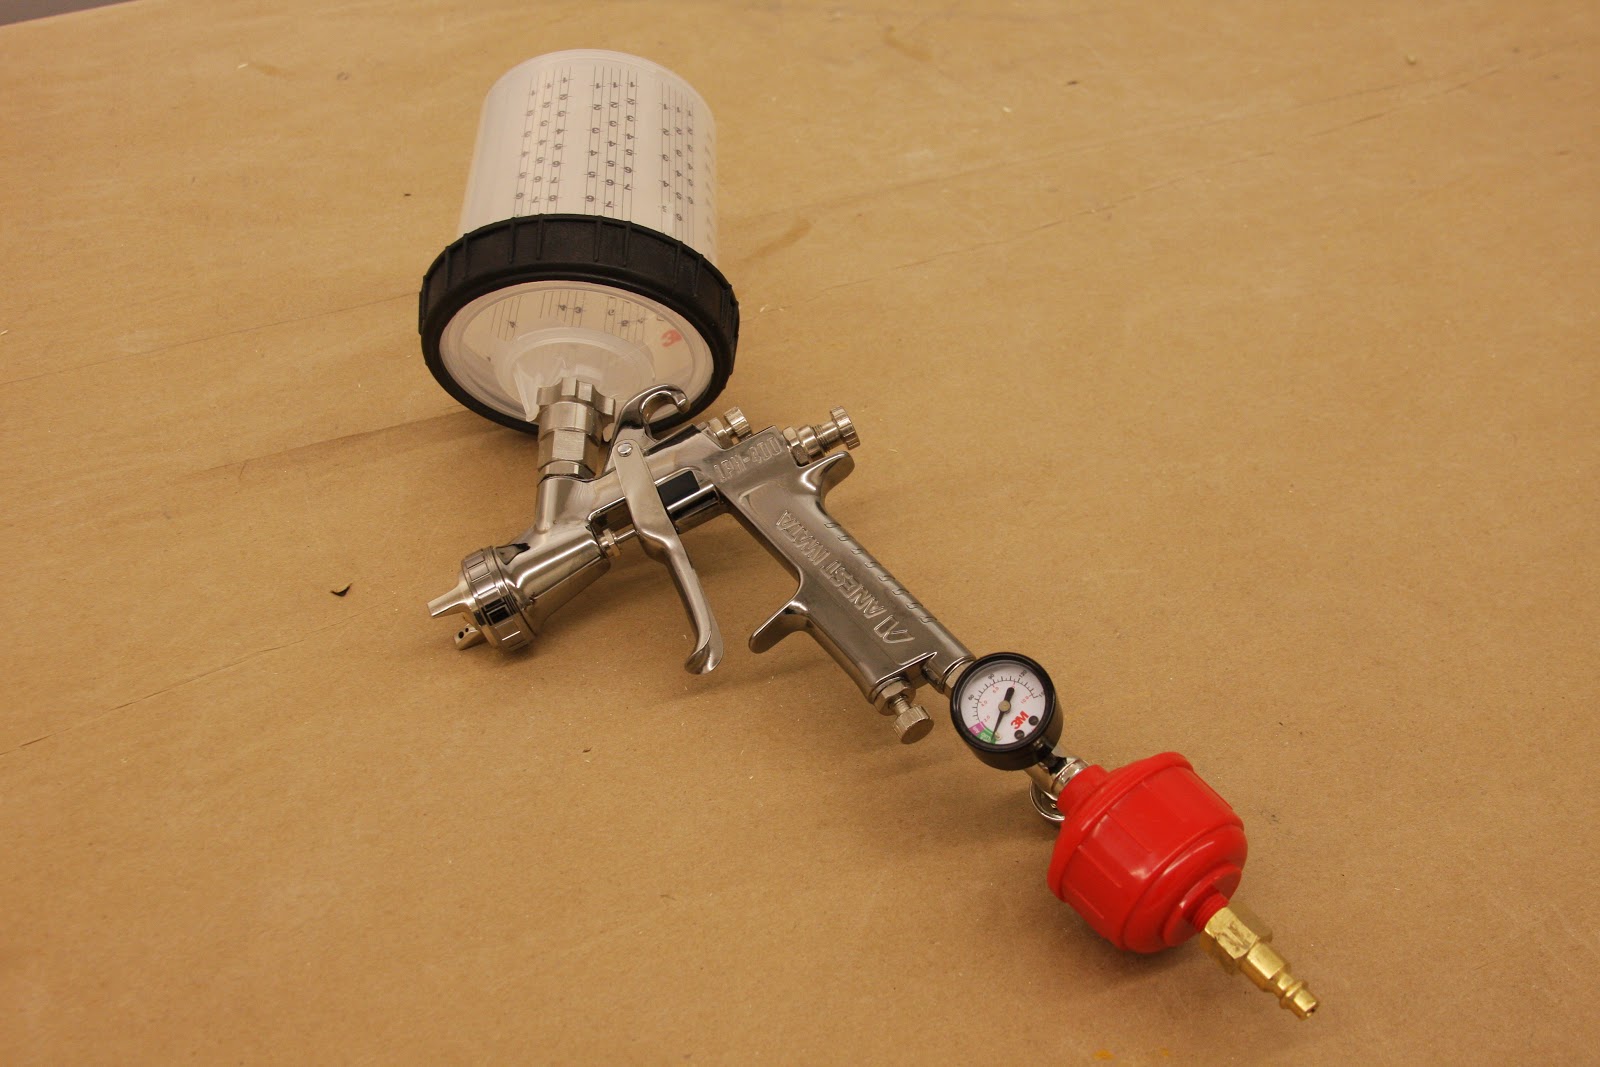
After reviewing a number of articles and videos on spray equipment I settled on purchasing a high volume low pressure (HVLP) gravity feed spray gun from Anest Iwata. It's their LPH-400 with a 1.3 tip. It a little expensive, but I've just including the cost of the equipment in the cost of my paint job.
Along with the quality gun I've added a water trap at the compressor and the small red water trap at the gun. I also added the small pressure regulator at the gun for more accurate control. I will be using the 3M Paint Preparation System (PPS) cup collar and flexible (throw away) liners. They should help when it comes time for clean up.
Spray Booth Construction
A spray booth is required to control paint over spray (so you don't paint your car by accident), to control the paint toxicity (these fumes can kill), and to keep dust and bugs out of your newly painted surface. I learned that auto paint stops flowing in about 45 minutes and aircraft paint is still flowing after 1 1/2 to 2 hours. A lot of time for a bug to find it's way to your paint.
My shop area is just barely large enough to allow the construction of a paint booth. I had to move some of my tools around, but I think it will work.
The paint booth is made up of 2" X 2" supports and plastic all around.
I use 2' X 2' furnace filters incoming air. I currently have two filters, the photo only shows one.
I was able to acquire an industrial squirrel cage fan to draw air away from my booth. Wood from one of my kit crates came in handy here.
A filter covers the front of the fan to filter out over spray still in the moving air.
I should note that the fan motor should not be in the air flow. The paint fumes could be ignited by the motor if it was in the air flow. This fan was selected with the belt drive so the motor is out of the air/fumes flow.
The fumes exit the shop through an open window. The left photo shows the window outlet. On the right you can see the inflated duct. The duct was simply made from sheets of plastic.
This is what the exit fan's filter looks like from inside the finished paint booth. The air flows from the top of the North/West corner of the booth to the bottom of the South/East corner of the booth. The filter is easily replaced. I'm sure I will be using a few filters before the plane is finished.
I have three hooks that are firmly tied to the rooms rafters that come down through the plastic at key points to hold the wings during painting. They will hang by the Flaperon hinges. This photo shows the fuselage in the paint booth. The fuselage will probably be the last large part that will be painted in the booth. By the way, I chose to build the painting booth in my shop because it is heated through the floor. The high outside today was 22 degrees F, but it was 70 degrees F in my shop. A good temperature to paint.
Respirator Design
A respirator is a must when you are using this type of paint. You can count on dieing or being very ill for a long time if you ignore the warnings on these paint systems. I looked into renting and buying respirator systems. Axis will sell you a respirator for about $430. I found this like-new air mattress pump shown in the photo at Goodwill for $3.99 with the flexible black hose. I added a replacement face mask from Axis, a couple of garden hose connections from Home Depot and my readily available garden hose and WALA! A perfectly good paint respirator for under $50. The only problem I have with it is that I get too much air. I'm thinking of adding a garden hose valve to bleed off some of the pressure. I'll place the air pump in the garage where it will pick up plenty of fresh air. The clip on the hose attaches to my belt loop to help pull the hose along.
Fuselage Pivot Design
This last item came about because I didn't want to try to paint the underside of the fuselage on my back. The belly of the plane is a large area and would take a lot of crawling around to try to paint it. I found that without the engine (it hasn't been installed yet) and without the wings and control surfaces the forward part of the plane only weighs 109 lbs and the tail section 35 lbs.
I found that I could easily attach a sheet of plywood to one of the engine mounts and the front of the firewall using already existing engine mount holes. On the plywood I attached a plumbers floor mount and a two foot pipe. The pipe then rest on the saw horse.
The tail section has a similar pivot design. The plywood is attached to existing bolt holes and the plumbers floor mount is attached to the plywood. A two foot pipe is again attached to the floor mount and the pipe rest on a saw horse.
When it comes time to paint the bottom of the plane I can simple rotate the fuselage over. I could paint it in the vertical position as shown or by rotating it 90 degrees further in the horizontal position completely up side down.
The fuselage is rotated to the desired angle by hand then held in place by attaching weights by rope. Not very sophisticated but effective. We'll see how effective when the moment of truth comes during painting.
Preparing to Paint
They say that 95% of the effort to paint is in the preparation. I've started that preparation by scuffing all surfaces that will be painted. This photo shows my two flaperons, one scuffed for painting the other still very shinny.
All my control surfaces are shown after they have been scuffed for painting.
Here the wings are layed out and the scuffing process started.
Shown is the fuselage under side before scuffing.
And the fuselage under side after scuffing.
The last photo for this section shows the fuselage top side after scuffing. Therefore I no longer have a shinny plane. That is until it is painted.


No comments:
Post a Comment